I have had several people ask how I put on an ink wash. Now that I have a blog, I have a proper place to describe how I do it. When I first started painting 1/300 scale miniatures I used a very fine lined calligraphy pen to highlight the etching lines and it looked fine, but I did feel that it was a , for lack of a better word. harsh. I then bought some HR miniatures and the etching lines were so faint, that it was as if they had none. I find the same is true for Raiden miniatures. Raiden has phenomenal detail, but a lot of it is lost when one applies paint. I tried airbrushing and spray paints on Raiden miniatures, but the detail just disappeared. So the following is a step by step process of how I enhance the etching lines of miniatures.
This takes some time to do, but only marginally longer than using a pen to highlight the etching lines. So the tools I use are a hobby knife, scribing pen and a hobby file. I bought the mine at Hobby Lobby, but I would think any model shop should have them or they should available online. In fact the scribing pen was made by Testors.
 |
| Scribing Pen is in the middle. | | | |
|
The first step is I take the Hobby knife with the back side of the blade. The sharp edge is facing away from the miniature. I then start to run the knife on all the etching lines. I always draw the knife towards me. I might do this two or three times on each etching line.
 |
| This miniature is untouched. | | | | | | | | | | | | | | | | | | | | | | | | | | | | | | | | | | | | | | | | | | | | | | | | | | | | | | | | | | | | | |
|
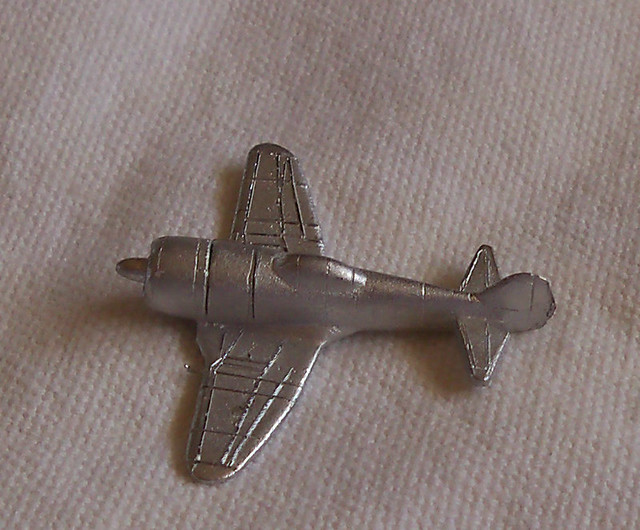 |
| After the hobby knife. |
I now take the scribing pencil and make the etching lines deeper. After I am finished doing that, I use the file and the hobby knife and debur the miniature. When I made the scribe lines deeper, I raised the edge of the lines and I have to get rid of those ridges. Also at the end of the etching line, there is a little burr of metal. One has to get rid of that too.
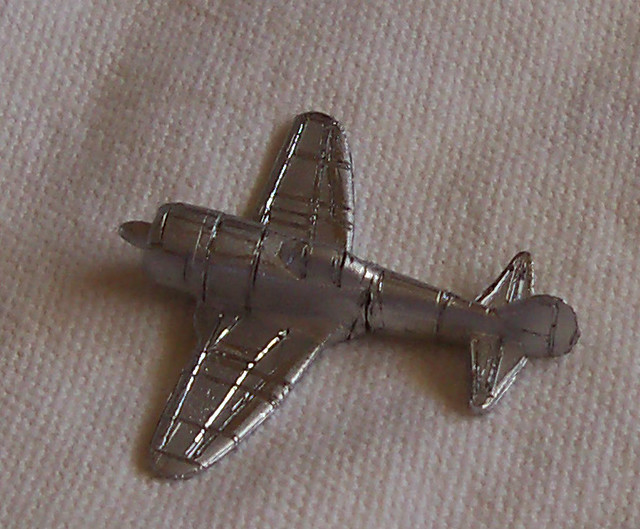 |
| This is before I have deburred the miniature. |
It looks a bit of a mess before it is deburred, but I assure you that it will look OK in the end. The next photo has three planes that have each progressive step. On the far left, the untouched miniature and on the far right, the miniature deburred.
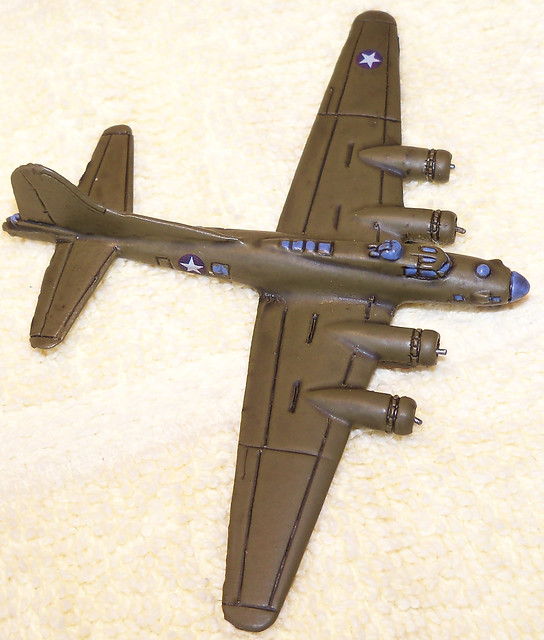
The next photo is the miniature painted and no wash applied.
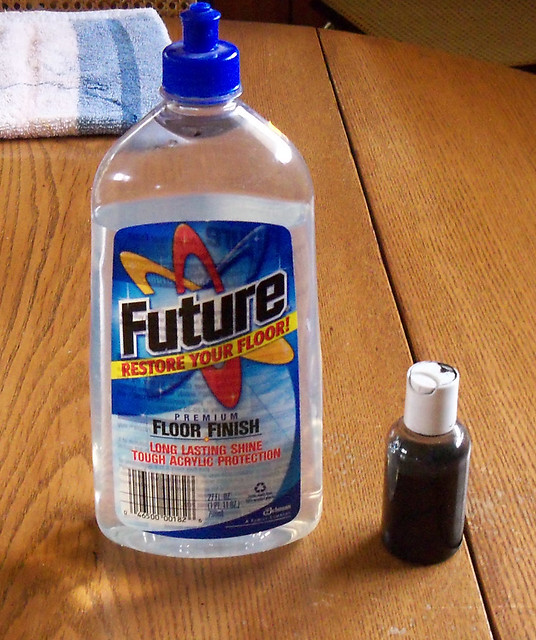
I use a 5 to 1 ratio of Future floor wax and DiDi's magic ink. I would presume that all inks would be the same, but I do not know. I have had both of these bottles for two years and I have probably put a wash on three to four hundred miniature, so these bottles last a long time.
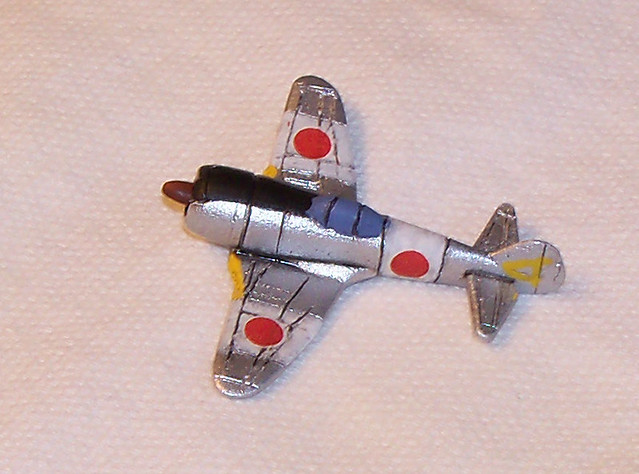
The following photo is the finished Ki-44 in 70th Fighter Sentai, 3rd Chutai colors. The only thing that was added after the wash was the decals and a coat of Testors Dulcotte.
I am not sure that this was my best effort, but it does show the process. I think the lines are more subtle than the calligraphy pen and overall better. The last photo is a better example of the finished wash.


